In this post, we will make use of NodeJS and Docker to provide and API which interfaces with an Elasticsearch instance in AWS.
Assuming you already have an AWS account, and aws-cli set up.
Process
- Write the NodeJS app locally
- Wrap it a docker image and deploy this image to a registry (we will use docker hub here)
- Use AWS ECS (EC2 Container Service) to deploy and scale your app in the cloud.
Write the NodeJS app locally
If you have your crendentials in ~/.aws/credentials, the connection to your Elasticsearch instance will be picked up
automatically. No need to worry about that.
We’re using here Jetbrain’s Webstorm and a new Express project comes with several dependencies, some of which we don’t
need. Still, let’s keep them for simplicity and add some others related to the project, in particular elasticsearch,
http-aws-es and aws-sdk.
package.json
{
  "name": "gardenlog-nodejs",
  "version": "0.0.0",
  "private": true,
  "scripts": {
    "start": "node ./bin/www"
  },
  "dependencies": {
    "aws-sdk": "^2.93.0",
    "body-parser": "~1.17.1",
    "cookie-parser": "~1.4.3",
    "debug": "~2.6.3",
    "elasticsearch": "^13.2.0",
    "express": "~4.15.2",
    "http-aws-es": "^2.0.5",
    "jade": "~1.11.0",
    "morgan": "~1.8.1",
    "serve-favicon": "~2.4.2"
  }
}
Docker container
With Webstorm you can use docker as your remote node interpreter.
Please refer to the relevant documentation for use.
Just add a Dockerfile at the root of your project.
Dockerfile
FROM node:boron

# Create app directory
WORKDIR /usr/src/app

# Install app dependencies
COPY package.json .
# For npm@5 or later, copy package-lock.json as well
# COPY package.json package-lock.json .

RUN npm install

# Bundle app source
COPY . .

EXPOSE 3000
CMD [ "npm", "start" ]
You are now ready to run your app in a container.
Run your container locally
aws cli gets credentials in a specific order
and so far, we’ve used the ones stored in the credentials file. This is fine because your local machine is where the
cli is installed. But the docker container has no idea about this file. We could share it or copy it with the container.
Another option, more production-friendly is to pass credentials as environment variables. It’s described below.
With docker cli commands
Build your image
docker build -t <your username>/node-web-app .Grab your credentials, we will pass them as environment variables.
cat ~/.aws/credentials[default] aws_access_key_id = YOUR_KEY_ID aws_secret_access_key = YOUR_SECRETRun it.
docker run -p 49160:3000 -d -e "AWS_ACCESS_KEY_ID=YOUR_KEY_ID" -e "AWS_SECRET_ACCESS_KEY=YOUR_SECRET" <your username>/node-web-appYou should now see your app at http://localhost:49160
When you’re happy with it, push it to your registry
docker push <your username>/node-web-app
If you’re not happy and need to amend your code, you need to repeat all these steps.
Configure Webstorm for it
Webstorm allows us to go far beyond that, and particularly use the debugger with Docker for instance. We can also teach him where to push images, and many other features.
There are two things to consider:
- Configuring docker to build images based on the
Dockerfileyou provide - Configuring the debugger to work with your container
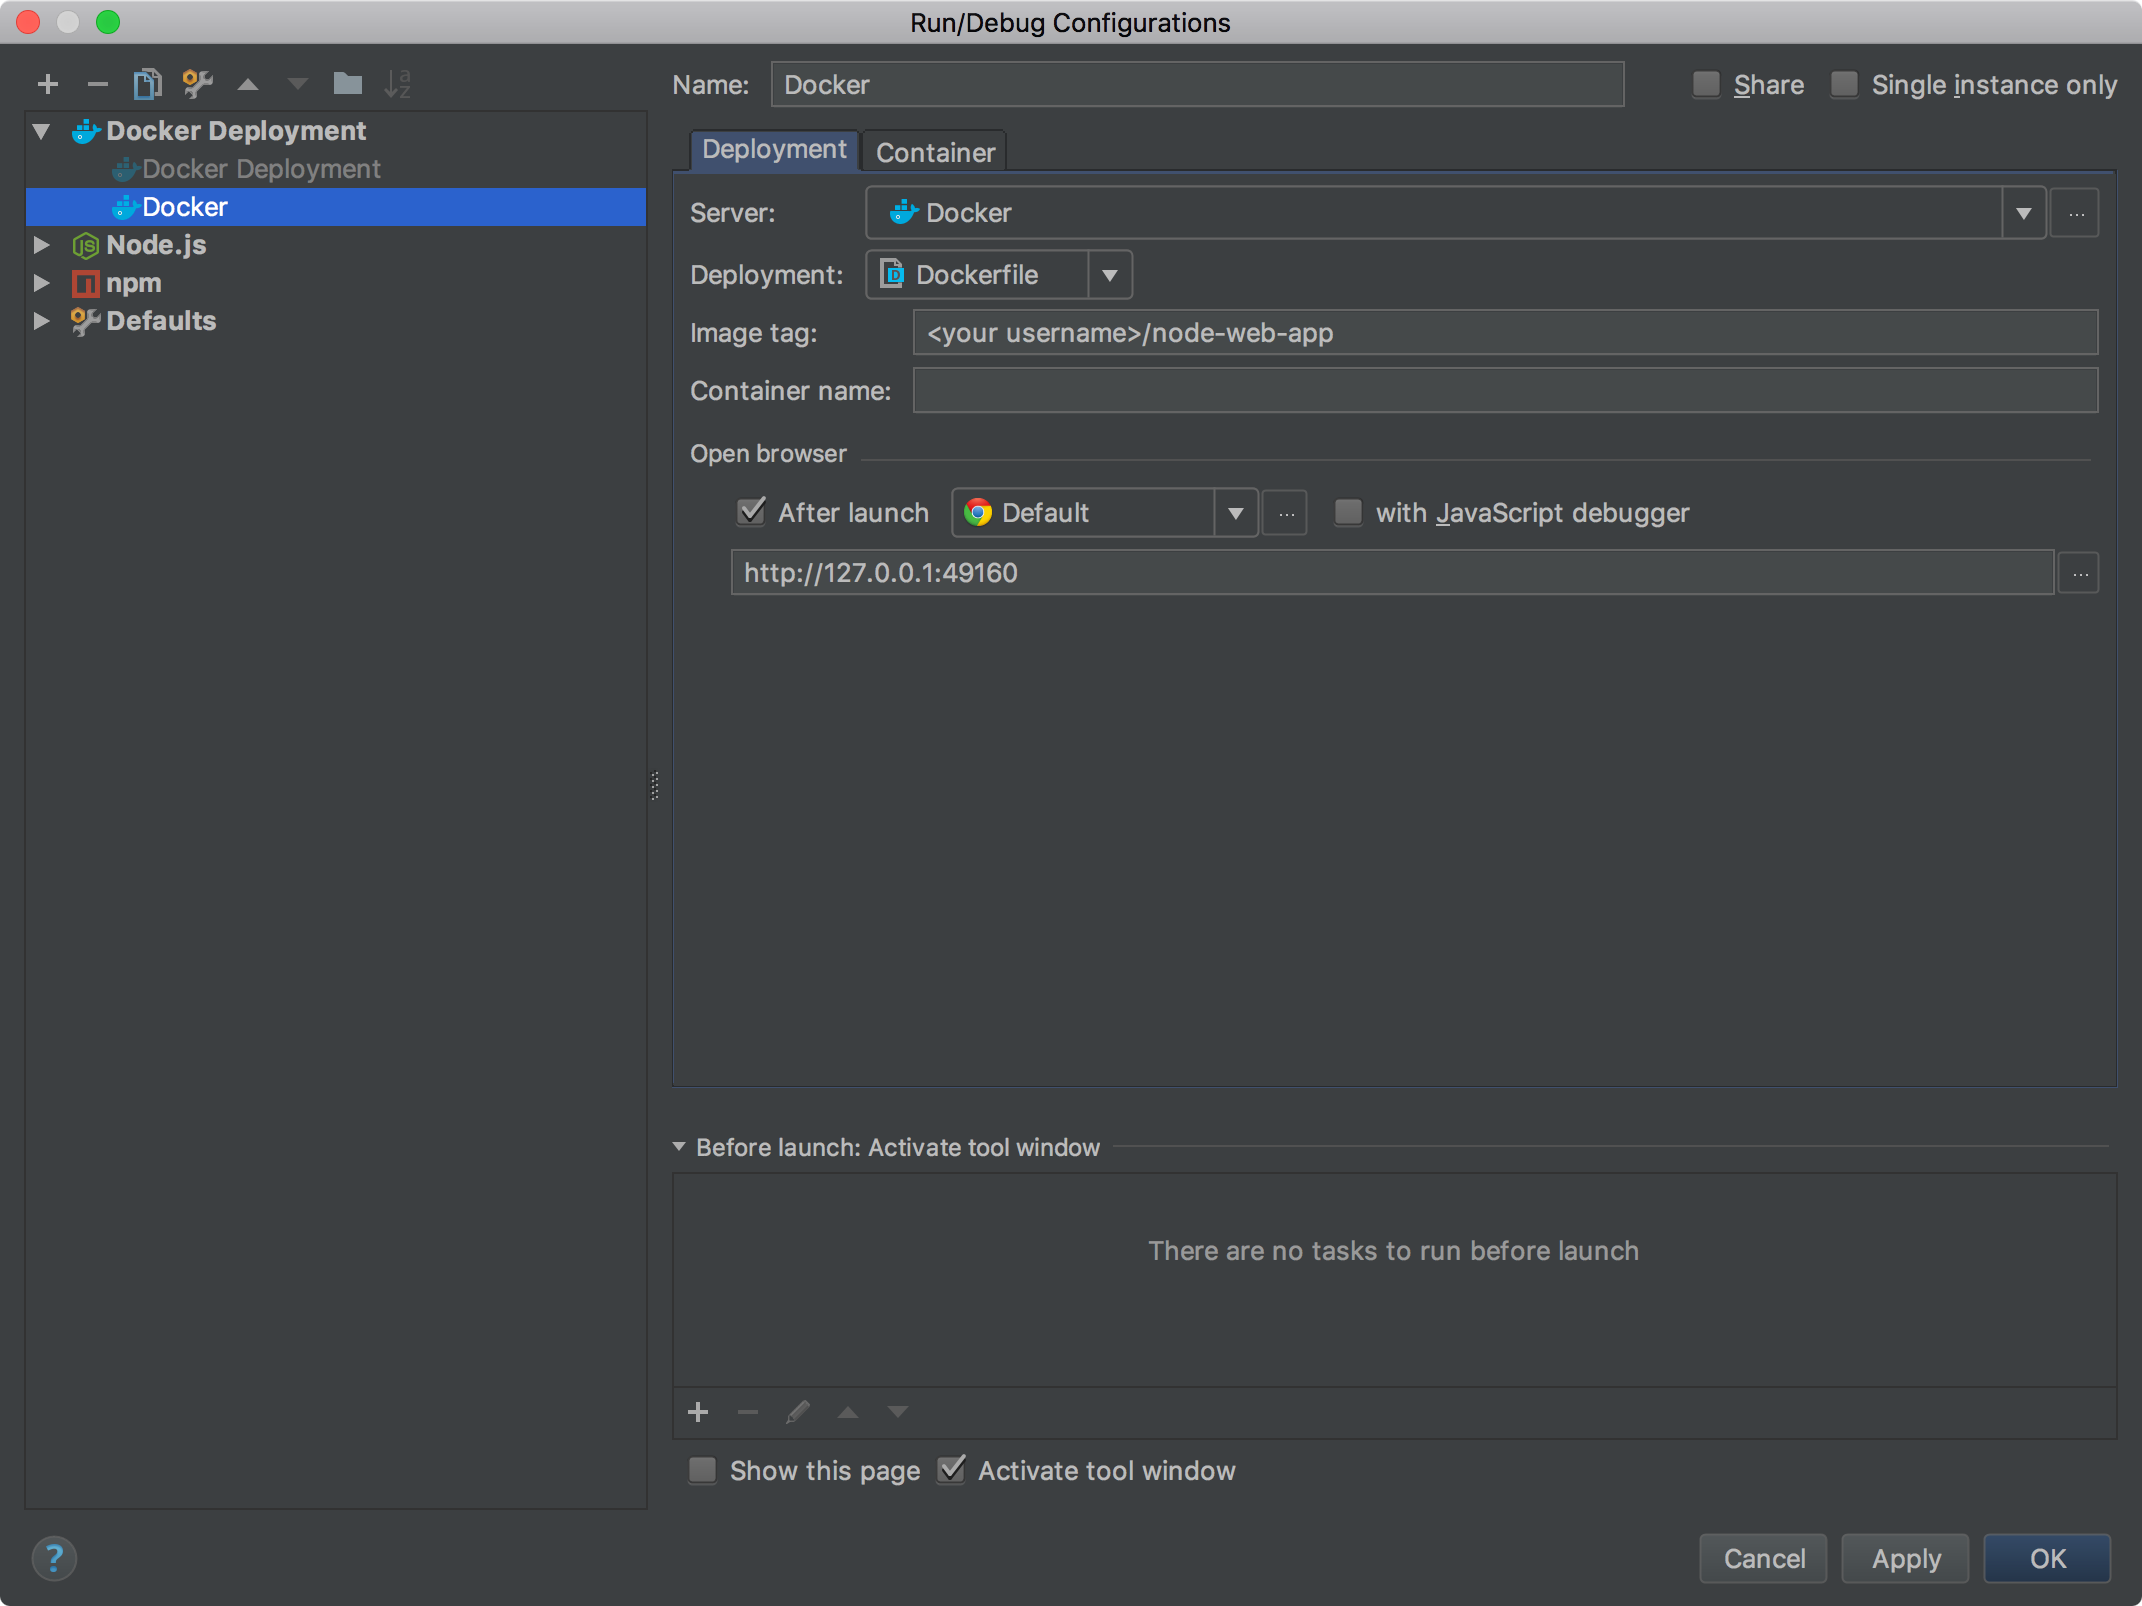
First, instruct Webstorm to use your Dockerfile, eventually setting it to launch your browser.

Docker Deployment Configuration
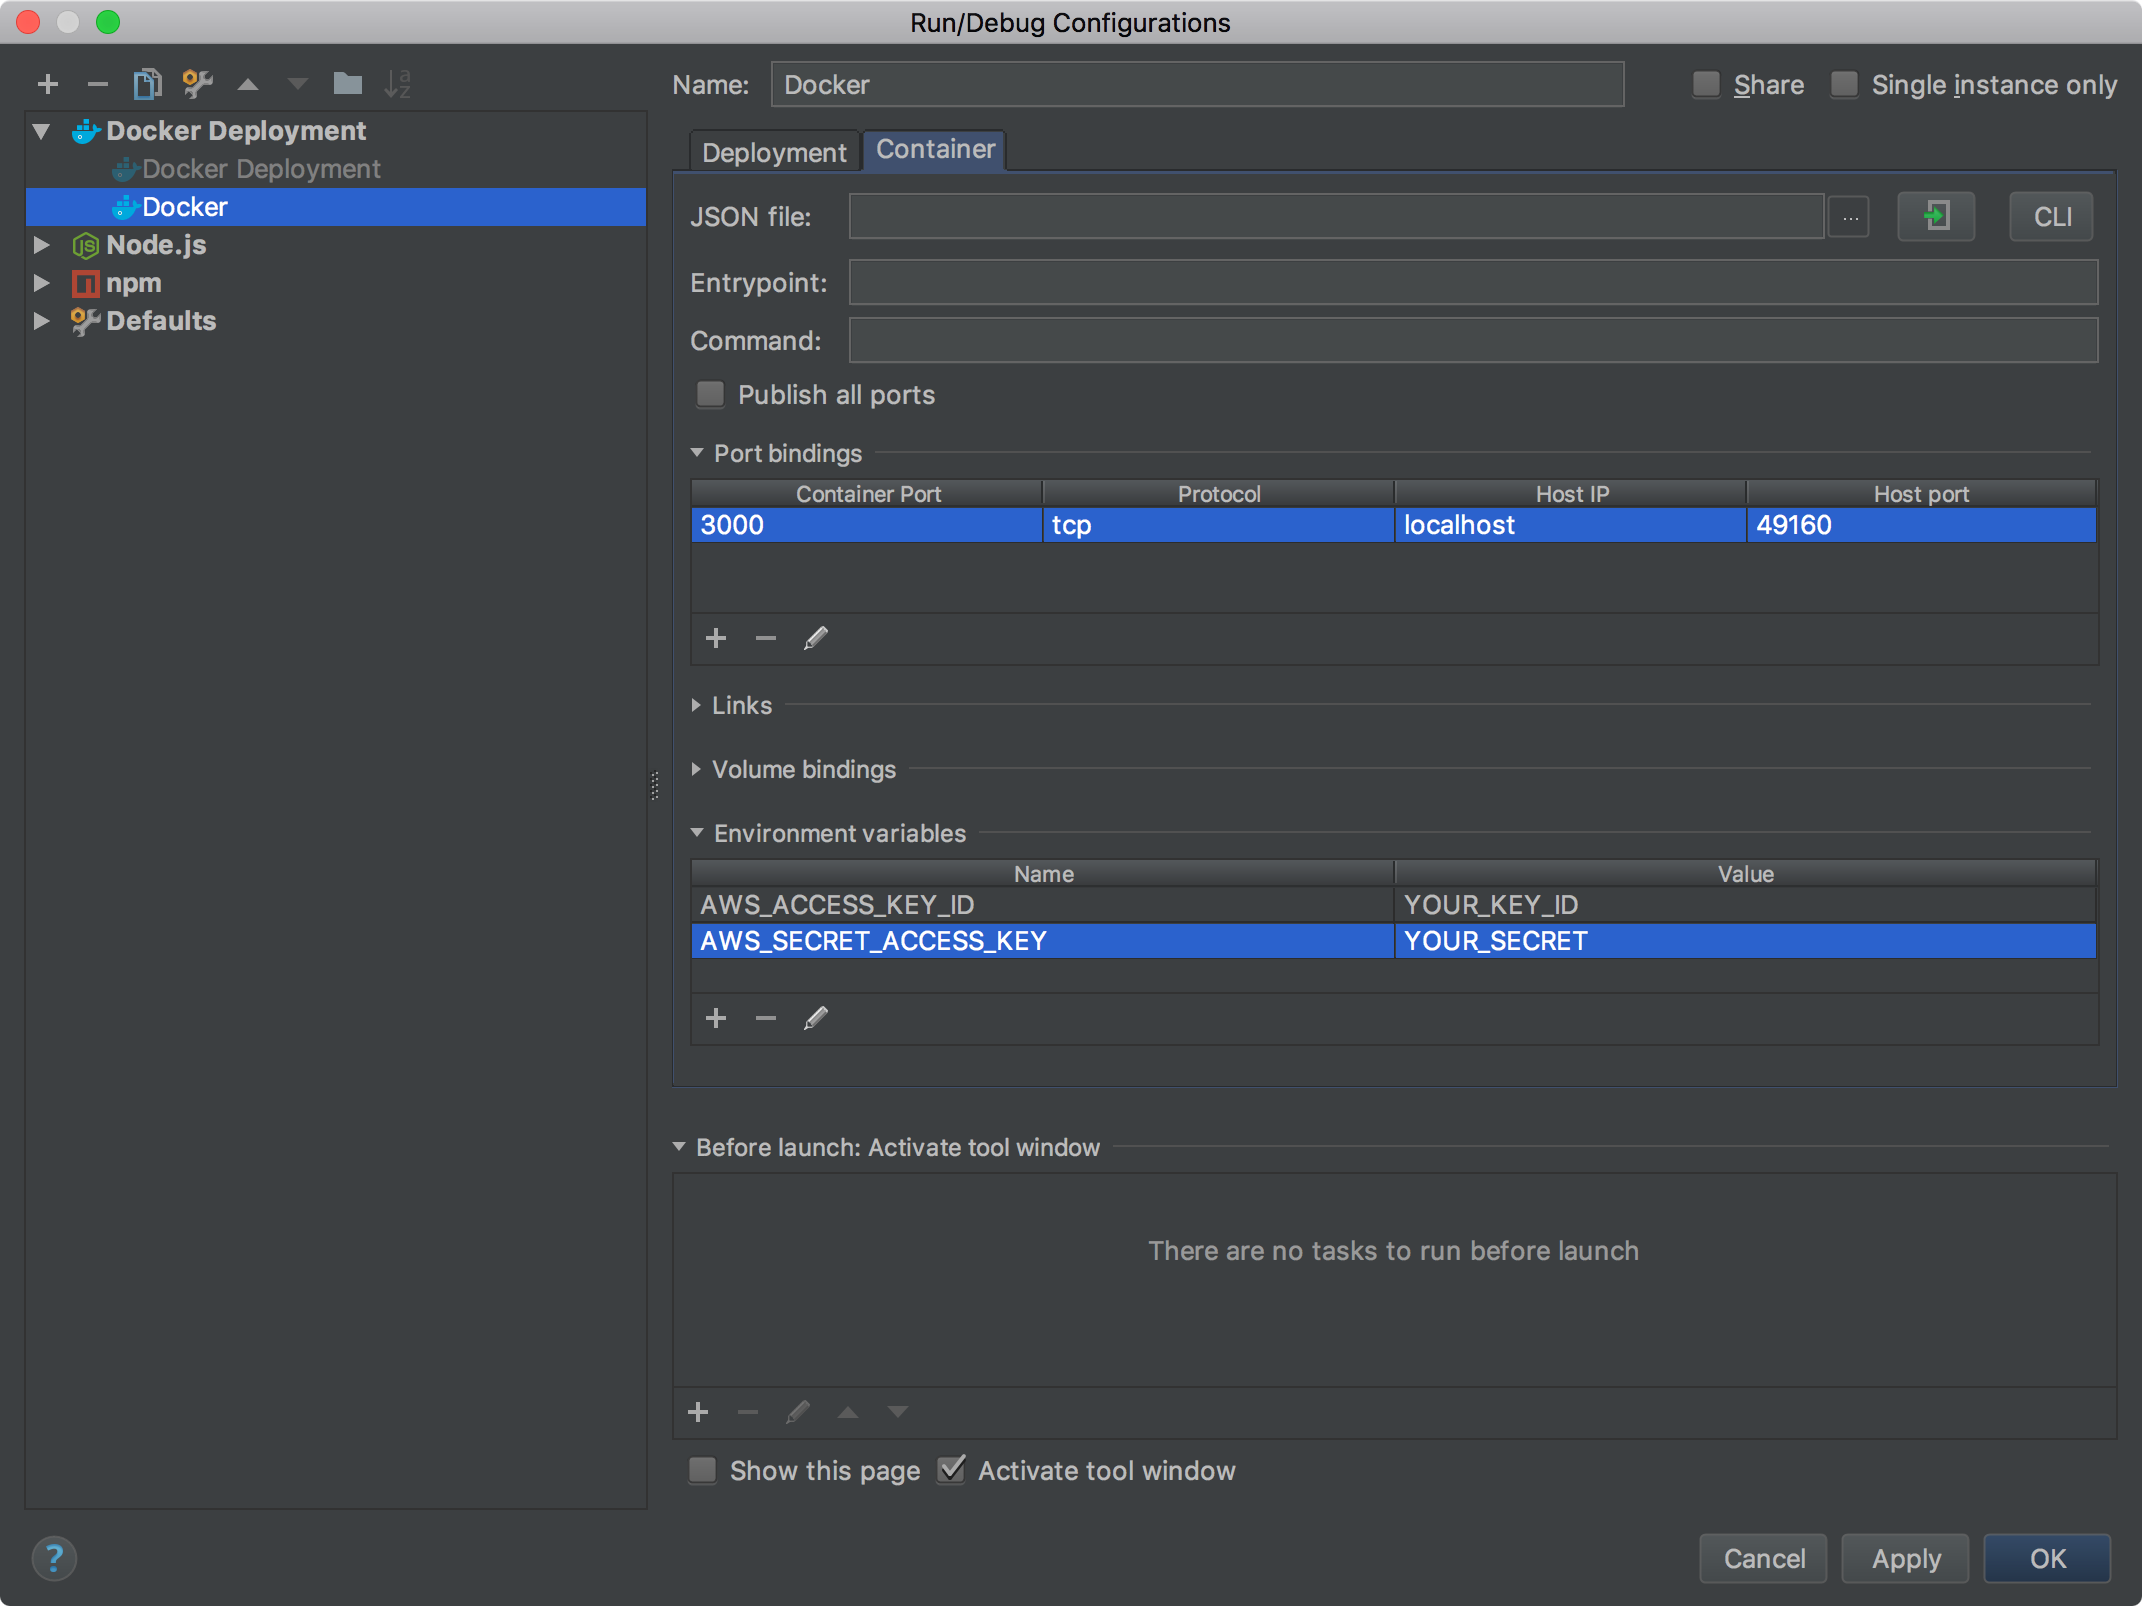
Next, set the container configuration, in particular environment variables and ports mapping.

Docker Deployment Configuration - Container
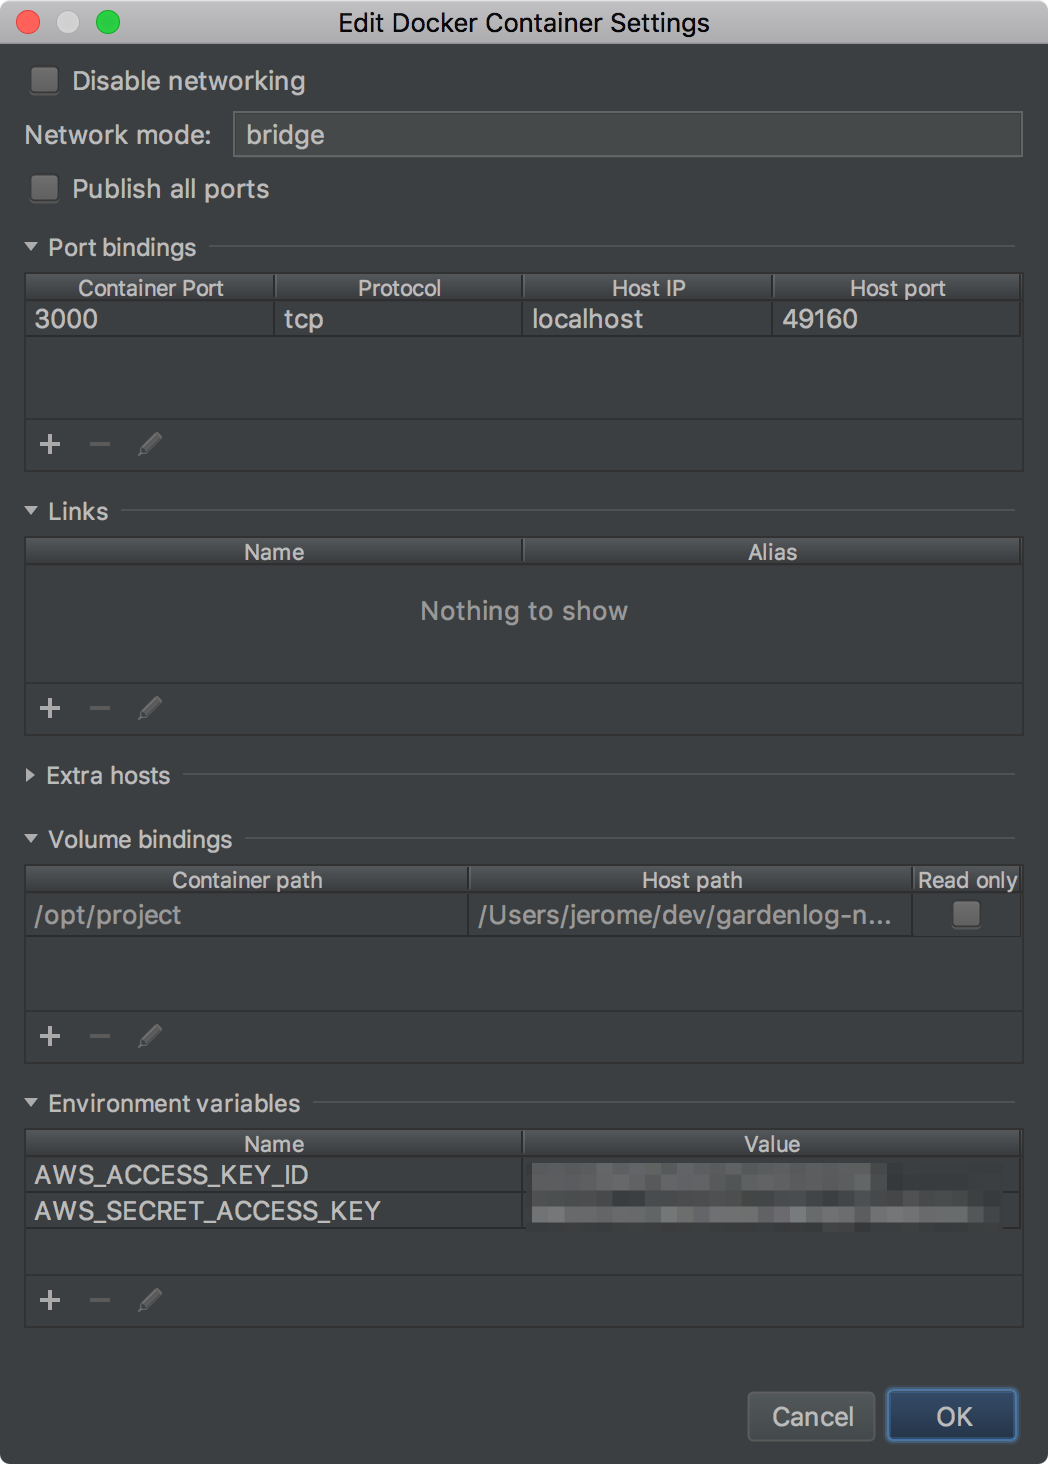
As for the debugger, we will instruct Webstorm to use the remote node in the docker container, and not the local one.

Debugger configuration

Debugger configuration - Container settings
Done. You can now build and deploy your docker images from the IDE, and debug through the container.
Go check the github repository for full details.


